Peanut Butter and Jelly Cookies Recipe
Introduction
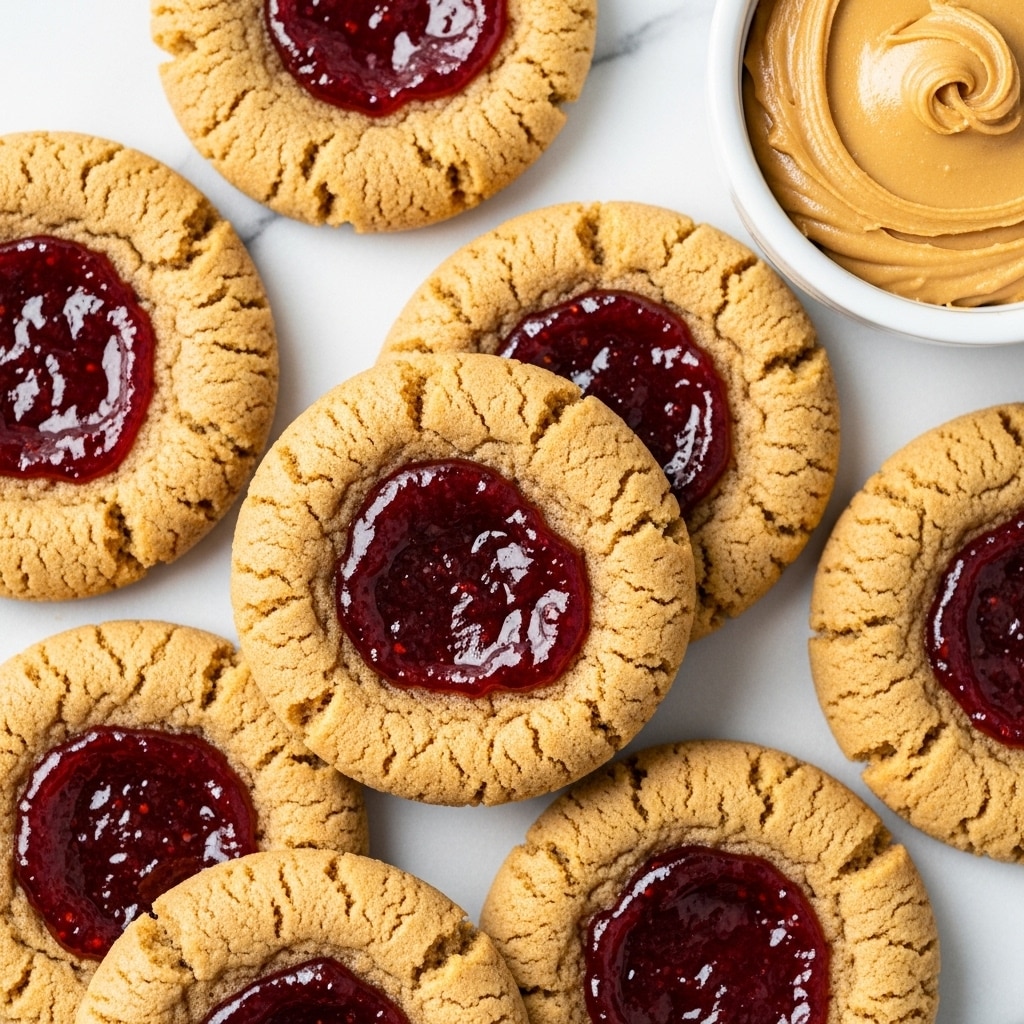
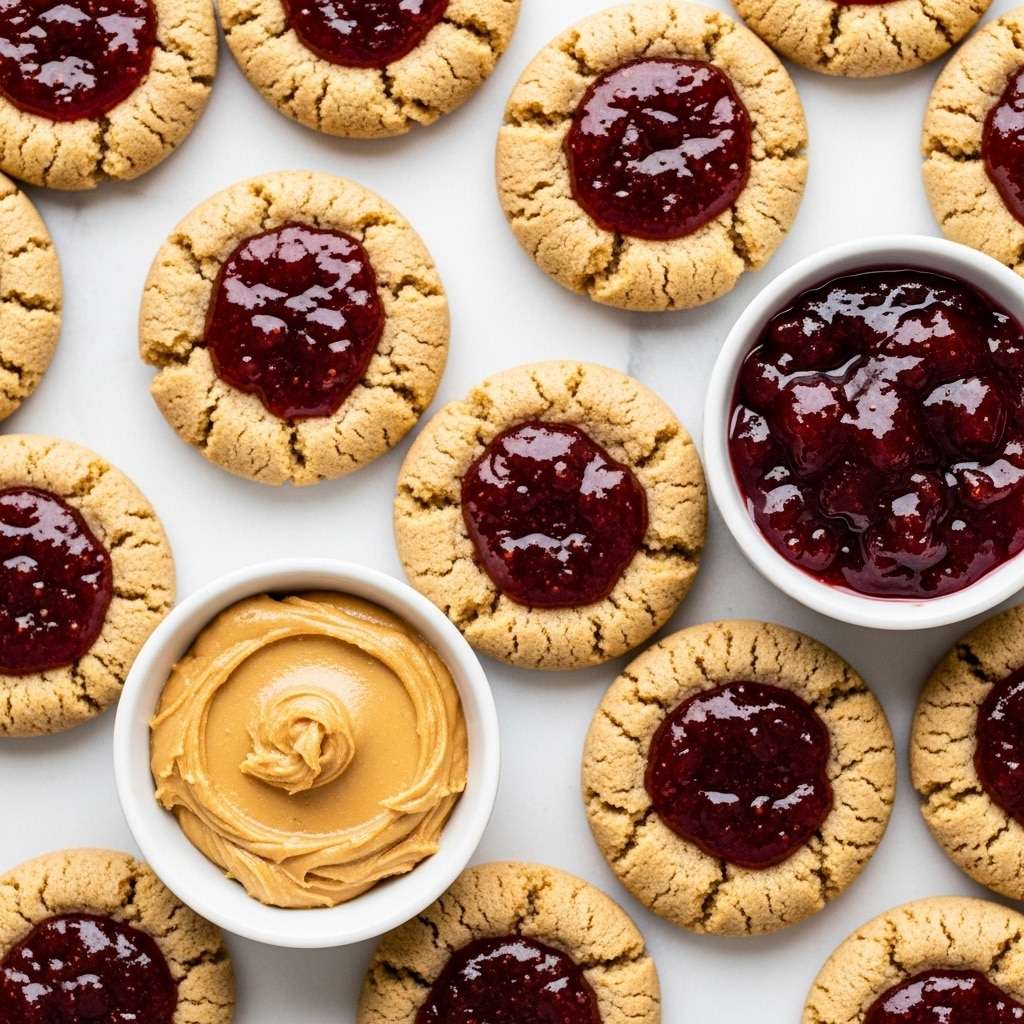
Peanut Butter and Jelly Cookies bring childhood nostalgia into a delightful baked treat. These soft, chewy cookies combine creamy peanut butter with a sweet dollop of strawberry jam for a perfect balance of flavors. They’re fun to make and even better to share.
Ingredients
- 1 stick (113 grams) unsalted butter
- 1 cup (270 grams) creamy natural peanut butter, very well stirred
- 1 cup (200 grams) packed light brown sugar
- 3/4 cup (150 grams) granulated sugar
- 2 ¾ cups (349 grams) bleached all-purpose flour
- ¾ teaspoon baking soda
- ½ teaspoon baking powder
- ½ teaspoon fine sea salt
- 2 large eggs, at room temperature
- 1 tablespoon milk
- 2 teaspoons vanilla extract
- ¾ cup (240 grams) strawberry jam or jelly, chilled
Instructions
- Step 1: Preheat the oven to 350°F. Line large rimmed baking sheets with parchment paper.
- Step 2: In a large microwave-safe bowl, microwave the butter in 20-second bursts until melted. Stir in the peanut butter until well combined. Add both sugars and whisk together. Let cool until just warm.
- Step 3: In a medium bowl, whisk together the flour, baking soda, baking powder, and salt. Set aside.
- Step 4: Add the eggs, milk, and vanilla to the butter mixture. Whisk thoroughly to combine. Stir in the flour mixture with a sturdy spatula until just combined.
- Step 5: Using a large spring-loaded cookie scoop, form the dough into 3-tablespoon rounds. Roll into smooth balls. Using your thumb, create a well in the center of each ball. Add 1 heaping teaspoon of chilled jam and partially seal with dough, leaving some jam visible. Lightly roll back into a ball. Place on the baking sheet with jam facing up, spacing about 3 inches apart.
- Step 6: Bake for about 14 minutes, or until the cookies are puffed and lightly browned at the edges.
- Step 7: Let the cookies cool on the baking sheet for 5 minutes, then transfer to a cooling rack to cool completely.
- Step 8: Store cookies in an airtight container for up to two days.
Tips & Variations
- Use natural peanut butter well stirred to ensure smooth dough. Chunky peanut butter will change the texture.
- Try different jam flavors such as raspberry or apricot for a unique twist.
- Chilling the jam before filling helps keep its shape and prevents it from melting too quickly in the oven.
- If you prefer crispier cookies, bake 1-2 minutes longer but watch carefully to avoid burning.
Storage
Store the cookies in an airtight container at room temperature for up to two days. They become softer the longer they sit. To reheat, warm gently in a microwave for 10-15 seconds to bring back a soft texture.
How to Serve
Serve this delicious recipe with your favorite sides.
FAQs
Can I use crunchy peanut butter instead of creamy?
You can, but the texture of the cookies will be different. Crunchy peanut butter adds more texture and may make the dough a bit harder to shape.
What can I substitute for all-purpose flour?
All-purpose flour works best for the right texture, but you can try a 1-to-1 gluten-free flour blend. The texture may vary slightly.
PrintPeanut Butter and Jelly Cookies Recipe

Peanut Butter and Jelly Cookies combine the classic flavors of creamy peanut butter and sweet strawberry jelly in a soft, chewy cookie. These delightful treats feature a tender dough filled with a gooey jam center, baked to golden perfection. Perfect for nostalgic snack lovers and cookie enthusiasts alike, they bring a playful twist to a timeless sandwich favorite.
- Prep Time: 15 minutes
- Cook Time: 14 minutes
- Total Time: 29 minutes
- Yield: 24 cookies 1x
- Category: Dessert
- Method: Baking
- Cuisine: American
Ingredients
Wet Ingredients
- 1 stick (113 grams) unsalted butter
- 1 cup (270 grams) creamy natural peanut butter, well stirred
- 2 large eggs, at room temperature
- 1 tablespoon milk
- 2 teaspoons vanilla extract
Dry Ingredients
- 2 ¾ cups (349 grams) bleached all-purpose flour
- ¾ teaspoon baking soda
- ½ teaspoon baking powder
- ½ teaspoon fine sea salt
Sugars
- 1 cup (200 grams) packed light brown sugar
- ¾ cup (150 grams) granulated sugar
Filling
- ¾ cup (240 grams) strawberry jam or jelly, chilled
Instructions
- Preheat and prepare baking sheets: Preheat your oven to 350°F (175°C). Line large rimmed baking sheets with parchment paper to prevent sticking and ensure easy cleanup.
- Melt butter and combine peanut butter and sugars: In a large microwave-safe bowl, melt the butter using 20-second bursts in the microwave, stirring in between until fully melted. Stir in the peanut butter until the mixture is smooth and well combined. Add the light brown sugar and granulated sugar, whisking thoroughly to blend. Set aside to cool until just warm to avoid cooking the eggs later.
- Mix dry ingredients: In a medium bowl, whisk together the all-purpose flour, baking soda, baking powder, and fine sea salt. This ensures even distribution of the leavening agents and salt needed for balanced flavor and texture.
- Combine wet and dry ingredients: Add the eggs, milk, and vanilla extract to the peanut butter mixture and whisk vigorously until fully incorporated. Gently fold in the dry ingredients using a sturdy spatula just until combined to avoid overmixing, which can toughen the cookies.
- Shape the dough with jam centers: Using a large spring-loaded cookie scoop, portion out 3-tablespoon rounds of dough. Roll each between your palms to smooth the surface. Create a well in the center with your thumb, add 1 heaping teaspoon of chilled strawberry jam or jelly, then partially seal it with dough, leaving some jam visible. Lightly roll it back into a ball so the jam peeks out on top. Place each cookie on the prepared baking sheet spaced about 3 inches apart to allow for spreading. Repeat with remaining dough.
- Bake the cookies: Bake the cookies in the preheated oven for about 14 minutes, or until they are puffed up and lightly browned at the edges. The jam should remain visible and slightly set.
- Cool the cookies: Allow the cookies to cool on the baking sheet for 5 minutes to firm up before transferring them to a wire rack to cool completely. This prevents breakage and helps proper setting.
- Store appropriately: Store the cooled cookies in an airtight container at room temperature for up to two days. Note that the cookies will gradually soften with time.
Notes
- Use natural, creamy peanut butter that is well stirred to ensure smooth texture in the cookies.
- Chilling the jam helps it hold its shape in the cookie during baking.
- Do not overmix the dough after adding flour to keep cookies tender.
- Cookies become softer the longer they sit, so consume within two days for best texture.
- Spacing cookies about 3 inches apart helps prevent them from merging as they bake.
Keywords: Peanut Butter and Jelly Cookies, PB&J Cookies, soft cookies, dessert, classic flavor, jam-filled cookies